How to set up Snap Nextcloud with NGINX Proxy Manager and Cloudflare SSL
Easily secure your Snap Nextcloud instance with your custom domain


Content List
Certificate
- If you already have the certificate files
- If you have created a Cloudflare SSL, but you haven't got the files
- If you haven't created a Cloudflare SSL or want to recreate one
Creating a fullchain.pem file
Inserting Cloudflare SSL to Nextcloud
Creating a new Cloudflare domain record
Adding a new Proxy Host to NGINX Proxy Manager
If you prefer watching a video, you can follow this awesome guide by DB Tech on YouTube:
At the start, I was confused with setting up my Cloudflare SSL to my Snap Nextcloud instance. I was stuck with only the .pem and .key file from Cloudflare. After an extensive search, I realized that I need to make my own fullchain.pem file from the .pem file and the Cloudflare Origin CA file from this Cloudflare site. So, in this article I'm gonna show you how to do that.
First, you can make a folder to store all your certificates. Simple issue the command below to make a folder called "certs" in the current directory and move to the newly created folder.
sudo mkdir certs
cd certs
Then, you can start making the .pem and .key file if you haven't. If you already have the .pem and .key file, you can just copy it to the folder we just created or you can just continue from the SSL directory.
If you already have the certificate files
Copy the already made certificates to the certs folder
sudo cp /path/to/certificate/{name}.pem /path/to/certs/folder
sudo cp /path/to/certificate/{name}.key /path/to/certs/folder
Or go to the certificate folder
sudo cd /path/to/certificate
If you have created a Cloudflare SSL, but you haven't got the files
If you have created the certificate in Cloudflare but forgot to copy the key, you need to create a new certificate because the key is only shown once after you created the certificate. Follow the guide below this to recreate a certificate.
Go to your Cloudflare domain dashboard, then SSL/TLS, then Origin Server. Press Download. You should get to this page.
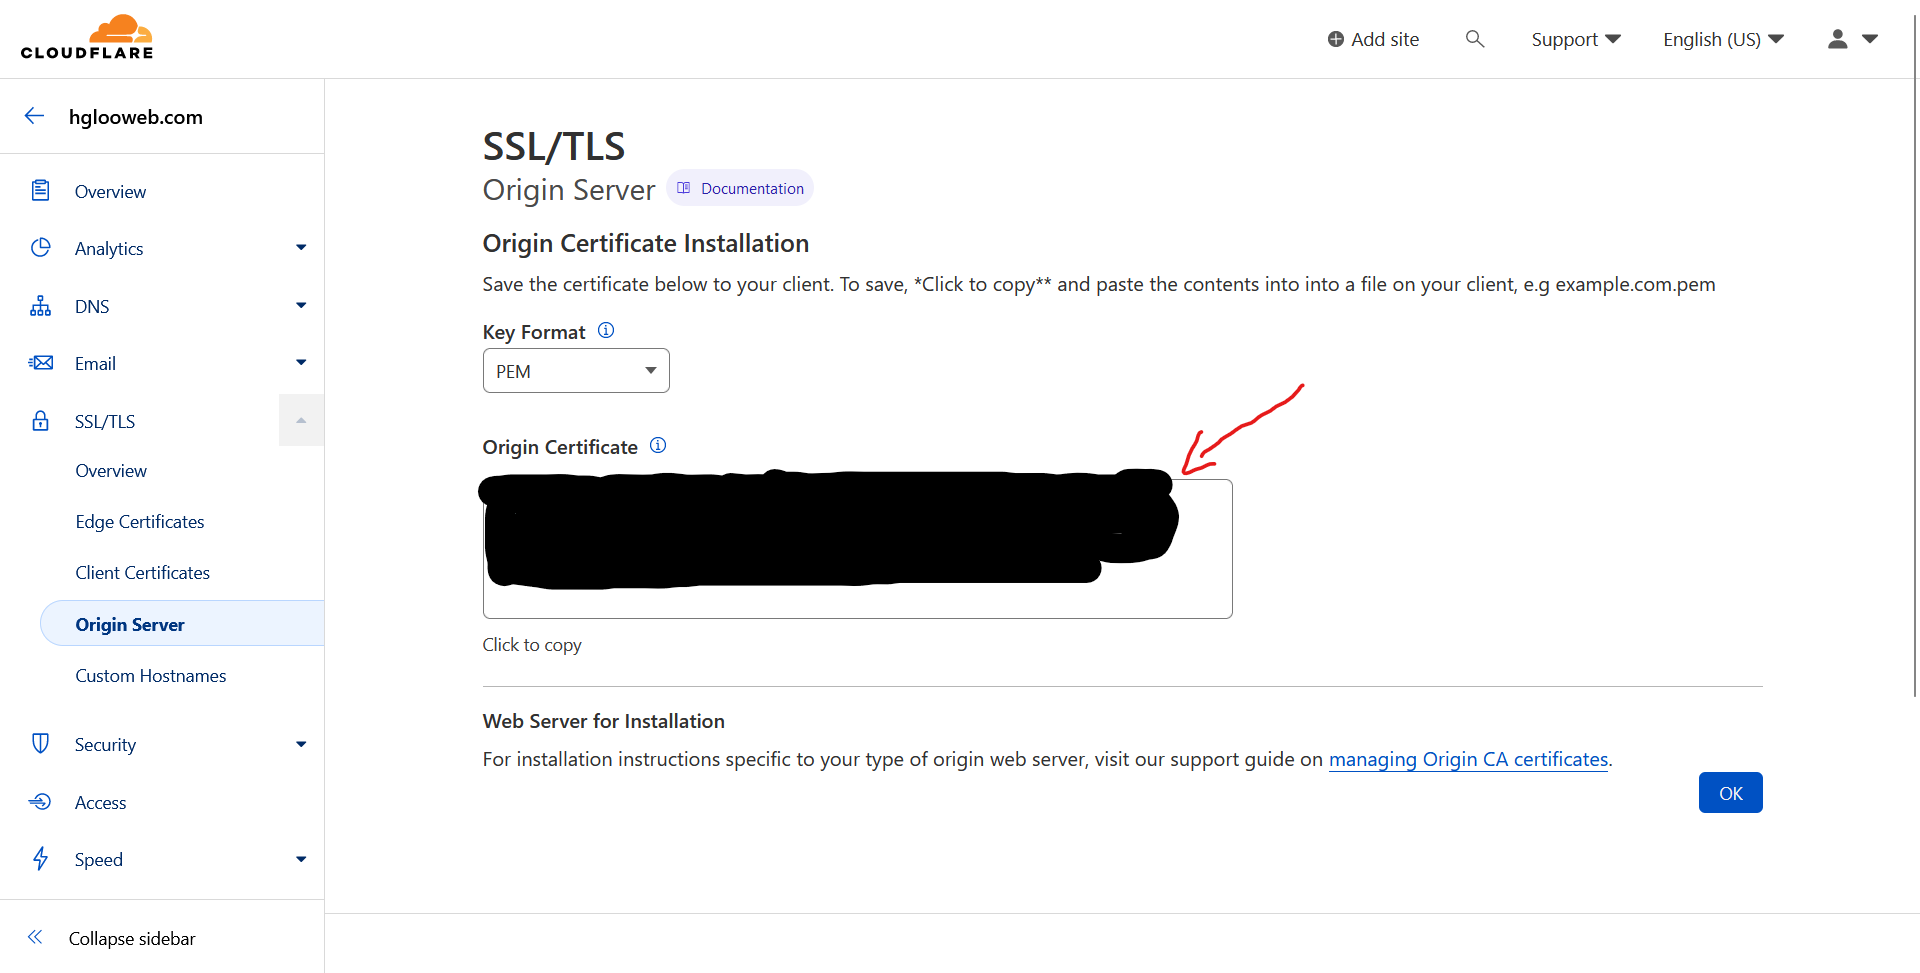
After creating, you can copy the cert (Origin Certificate) as shown below.
Issue the command below in your terminal and paste the cert inside. You can change the file name into anything. For example certificate.pem or {your domain name}.pem. After pasting, Ctrl + O then Enter to save the file, then Ctrl + X to exit the text editor.
sudo nano domain.pem
Now you can continue to create the fullchain.pem file after the guide below.
If you haven't created a Cloudflare SSL or want to recreate one
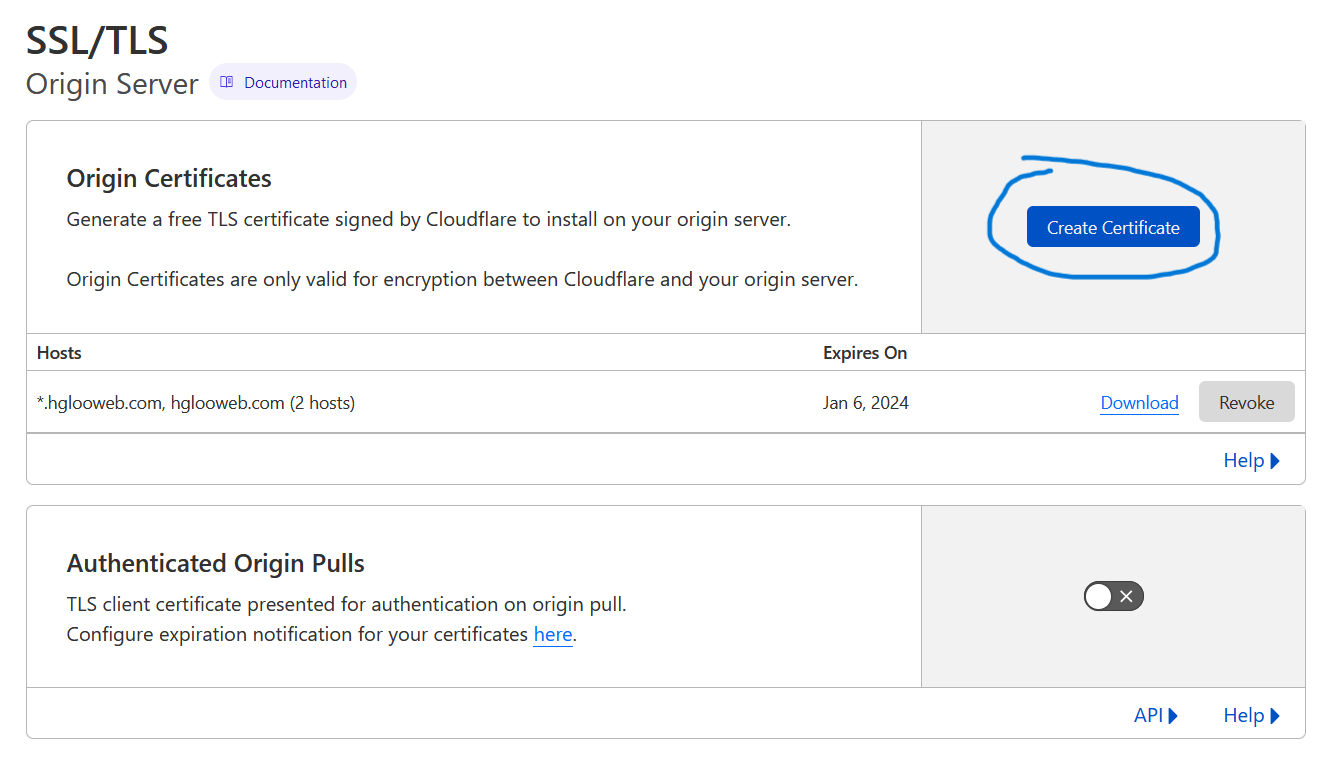
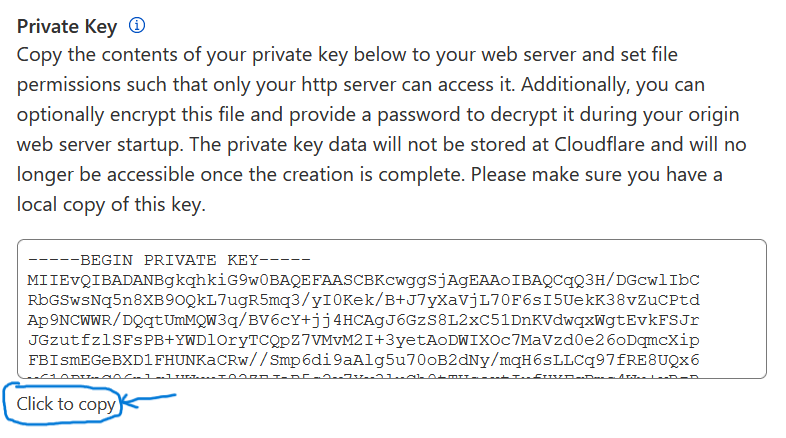
Go to your Cloudflare domain dashboard, then SSL/TLS, then Origin Server. Click on Create Certificate.
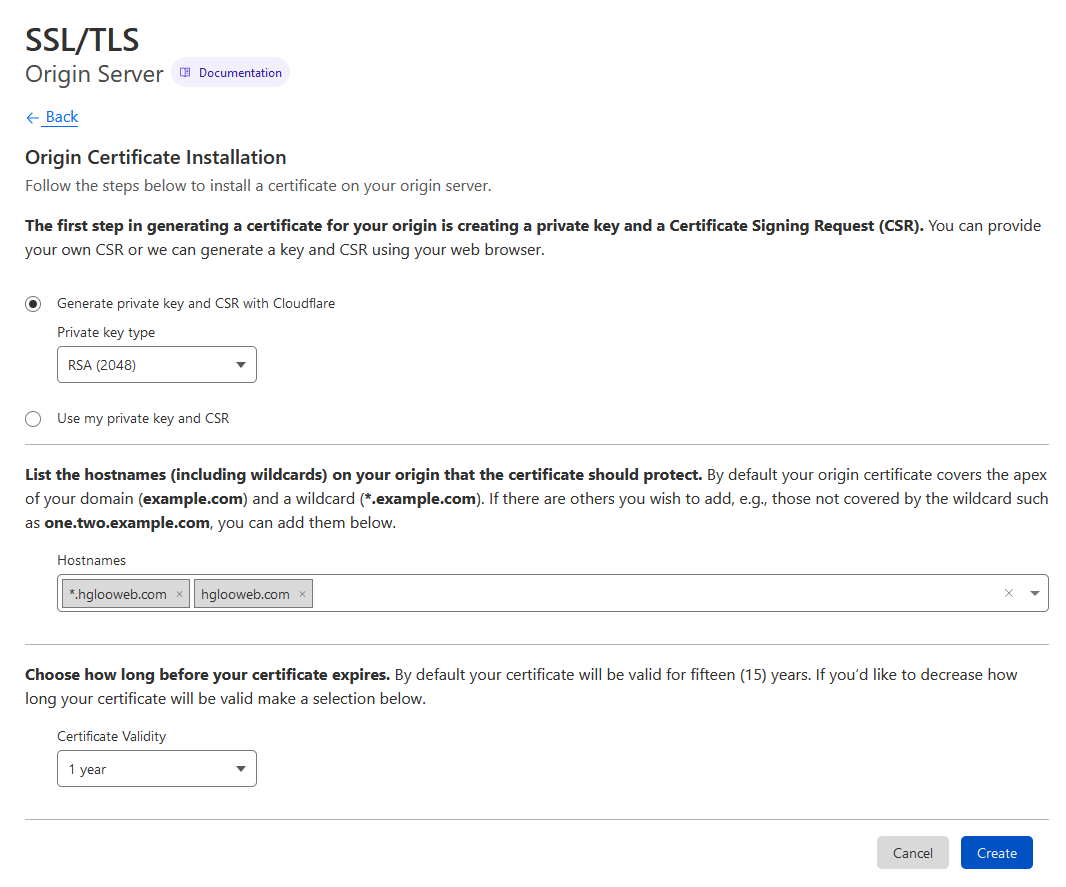
Then fill in your domain, including your hostname (hglooweb.com in my example) and wildcard (*.hglooweb.com in my example). Leave the rest the same as the picture below. You can choose longer duration of Certificate Validity, but it's not recommended. Then click the blue Create button.
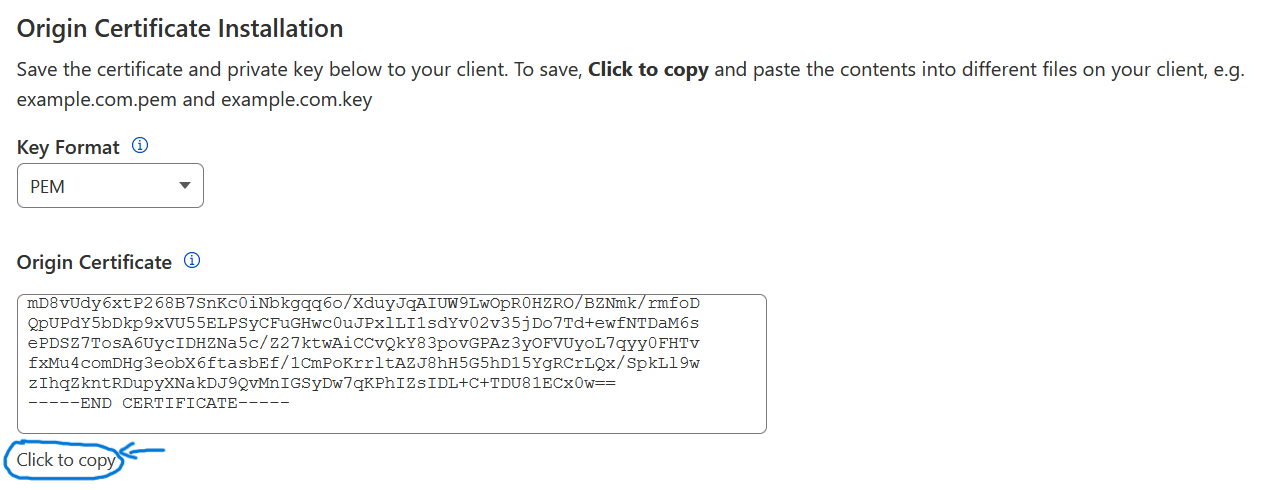
After creating, you can copy the cert (Origin Certificate) as shown below.
Issue the command below in your terminal and paste the cert inside. You can change the file name into anything. For example certificate.pem or {your domain name}.pem. After pasting, Ctrl + O then Enter to save the file, then Ctrl + X to exit the text editor.
sudo nano domain.pem
Go back to your Cloudflare page and copy the Private Key like before.
You can then create your key file or .key file by issuing the command below. You can also customize the file name. I recommend to keep the same name from the .pem file created before. After pasting, Ctrl + O then Enter to save the file, then Ctrl + X to exit the text editor.
sudo nano domain.key
Now you can continue to create the fullchain.pem file.
Creating a fullchain.pem file
Now we need to get the CA file from Cloudflare. You can download from this link or use wget like below. Download the RSA one.
sudo wget https://developers.cloudflare.com/ssl/static/origin_ca_rsa_root.pem
We can now make the fullchain.pem file. First, we need to go into root. Issue the command below.
su
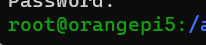
After becoming a root user with 'root' in front of your name like shown in the picture above, issue the concatenate (cat) command below.
cat domain.pem origin_ca_rsa_root.pem fullchain.pem
After successfully executing the command above, issue an 'exit' command and do 'ls' to confirm the file.
exit
ls

Now we have all the required certificate files for Nextcloud.
Inserting Cloudflare SSL to Nextcloud
Now that we have all the certificates needed, we can tell Nextcloud to use it. Issue the command below to do that. Change the path to the appropriate location of your certificate files. In my case, I'm still on the same directory as before. So I can just input the certificate file name.
nextcloud.enable-https custom -s domain.pem domain.key fullchain.pem
Creating a new Cloudflare domain record
Before you continue, it is important to make sure that you have a CNAME record that points your domain name to your home IP address. You can use the steps below to create one first. Fill in the 'name' column with your domain name (hglooweb.com in my case) and your home IP address on the 'target' column. You can use a Dynamic DNS service like No-IP if your home IP is dynamic. After you are sure, you can continue.

To create a new CNAME record, go to your domain dashboard, then go ahead to the DNS tab. Here you can specify all kinds of records that you want to add. Click at the 'Add Record' button. Change the type to CNAME, specify a name, and point the target to '@'. You can use any name you want.

Adding a new Proxy Host to NGINX Proxy Manager
After creating a Cloudflare CNAME record for Nextcloud, we can now redirect the CNAME record with SSL to our Nextcloud instance using NGINX Proxy Manager. In the NGINX Proxy Manager dashboard, go to 'SSL Certificates' and create a new custom certificate using the 'Add SSL Certificate' then 'Custom'.
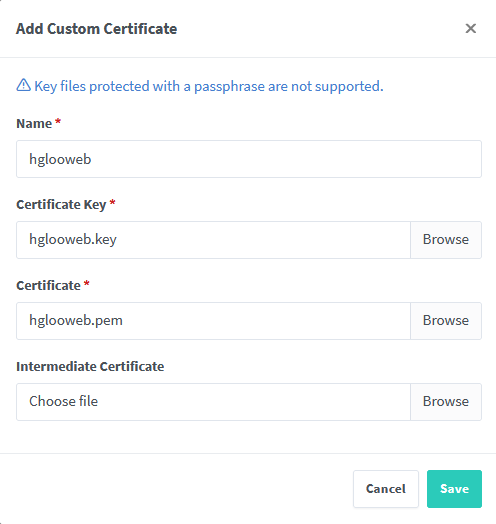
Use the .key and .pem file that we have created before and specify a name. You can use any name you want. Leave the 'Intermediate Certificate' as is.
Next, we create a proxy host. Go to 'Dashboard', then 'Proxy Host'. Click 'Add Proxy Host' and follow the picture below.
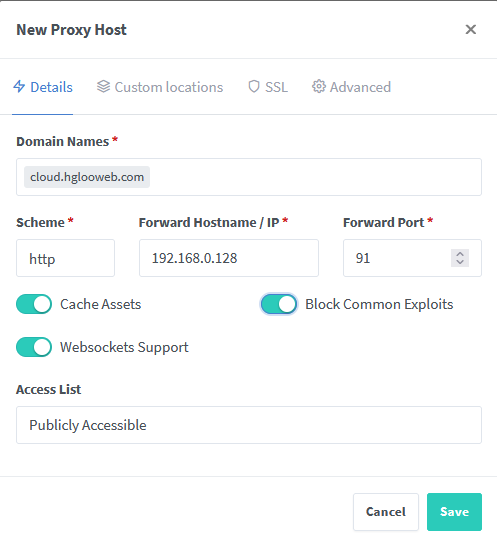
Change the 'Domain Names' column according to your CNAME record that you have created before. Change the 'Scheme' column to https. Then change the 'Forward Hostname/IP' and the 'Forward Port' column according to your local Nextcloud server. In my case, my OrangePi IP is 192.168.0.128 and I have changed my Nextcloud https port to 91. If your Nextcloud instance is a Snap package like mine, you can easily change your ports by following this guide. A normal Nextcloud https port should be 443.
After that, you can move to the 'SSL' tab and use the custom SSL like the picture below.
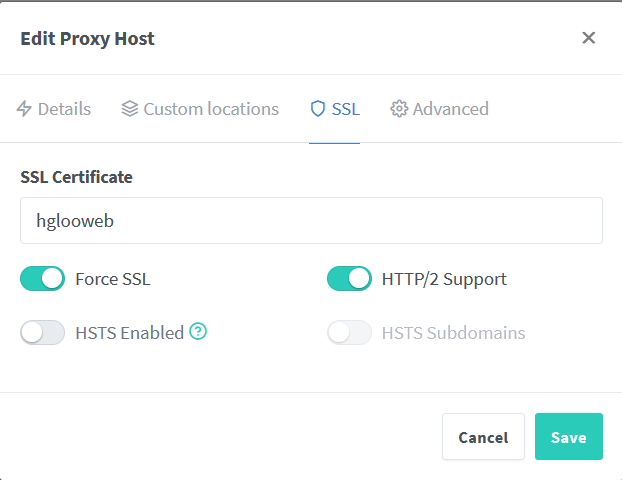
And you are done!